Home Pull-Up Bar Buying Guide: Load-Bearing Structure & Installation Safety
- Published on
Pull-ups are one of the most effective back exercises, but improper installation of a home pull-up bar can lead to serious accidents. This guide covers everything from structural types to safety standards, helping you choose and install the right one.
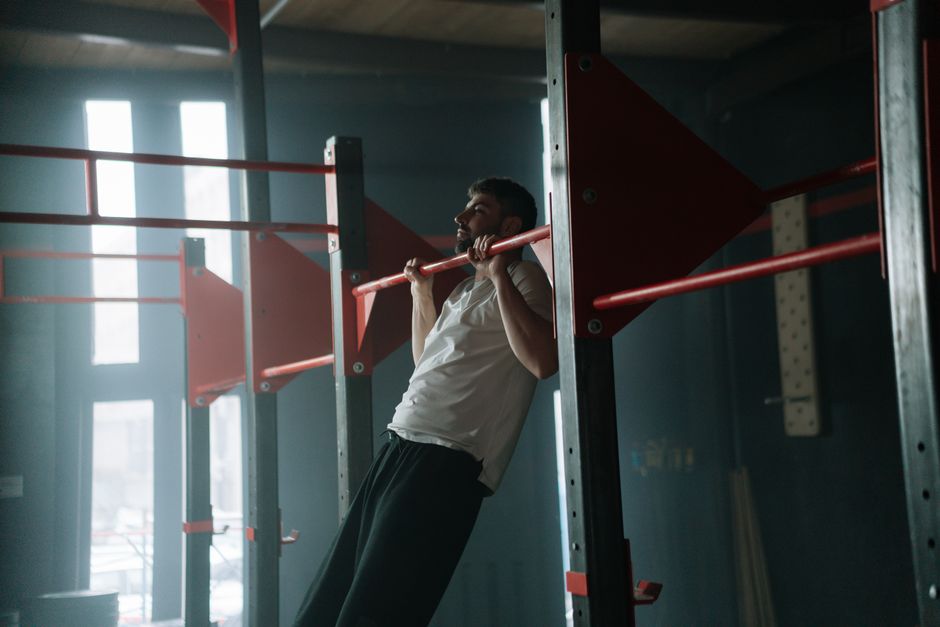
1. Comparison of Home Pull-Up Bar Types
Door Frame Clamp-On Pull-Up Bar (Most Common)
Principle: Uses pressure clamps on both sides of a door frame, secured by reaction force.
Advantages:
- No-drill installation: No damage to walls, easy to move
- Quick setup and takedown: Done in under 5 minutes
- Low cost: Typically 100–300 RMB
Disadvantages & Risks:
- Requires a solid wood door frame for adequate strength
- Do not use on hollow, drywall, or aluminum alloy door frames
- Maximum load is usually 150–200 kg
- Risk of accidental detachment during use (fixation relies on friction)
Key Buying Factors:
- Maximum load: ≥150 kg (well above user body weight; safety margin is critical)
- Clamp material: Steel, not cast iron (cast iron is brittle and prone to fracture under impact)
- Non-slip rubber: Thick, high-quality rubber pads at contact points to prevent slipping
Pre-Installation Test:
- Firmly push both sides of the door frame to check for looseness
- Perform a few test pull-ups with no weight to verify stability
- Confirm the door frame width is within the product's compatible range (typically 80–100 cm)
Free-Standing Pull-Up Station
Structure: Comes with its own base and support frame, placed independently.
Advantages:
- Does not rely on walls or door frames
- Better stability (floor friction + self-weight)
- Often multi-functional (can be used for dips, hanging resistance bands, etc.)
Disadvantages:
- Large footprint (typically 1×1.5m or more)
- Higher cost: Usually 500–2000 RMB
- Difficult to move
Load-Bearing Selection: Free-standing stations typically have higher load capacities (200–300 kg). Choose one rated for at least 1.5 times your body weight.
Wall-Mounted Pull-Up Bar (Most Stable)
Principle: Secured to a load-bearing wall using expansion bolts.
Advantages:
- Most stable, no risk of detachment
- Foldable models save space
- High load capacity (300 kg+)
Disadvantages:
- Requires drilling, damages walls
- Must be mounted on a load-bearing wall (brick or concrete); do not use on non-load-bearing walls or drywall
- Requires higher installation skill
Installation Key Points:
- Use a stud finder to confirm the wall is load-bearing (concrete or brick)
- Use expansion bolts of M10 or larger
- Drill depth ≥6 cm
- Perform a full load test after installation (hang weight equal to 2× your body weight)
2. Bar Diameter & Grip Comfort
| Bar Diameter | Characteristics | Suitable Hand Size |
|---|---|---|
| 25–28 mm | Thin bar, fingers can fully wrap around | Smaller hands, beginners |
| 28–32 mm | Standard diameter, comfortable for most | Universal |
| 32–38 mm | Thick bar, increases forearm training difficulty | Advanced strength, grip training |
Knurling Texture:
- With knurling: Improves grip, prevents slipping when hands are sweaty
- Knurling depth: Too shallow = no grip; too deep = abrasive on hands
- Recommendation: Choose medium-depth knurling
3. Scientific Guide to Pull-Up Training
Can't Do a Pull-Up as a Beginner?
Assisted Methods:
Resistance Band Assistance
- Loop a resistance band over the bar and step on it for support
- Band color indicates resistance (red ≈ 10–15 kg assistance, blue ≈ 25–35 kg)
- Gradually reduce band resistance until you can do unassisted pull-ups
Eccentric (Negative) Training
- Jump up to the top position (chin over the bar)
- Lower yourself slowly, controlling the descent over 3–5 seconds
- Focus on the eccentric phase to build strength
Assisted Machine Training
- Use an assisted pull-up machine at the gym to offset body weight
Proper Form Points
- Grip: Overhand (palms facing away) targets the back better; underhand (palms facing in) engages the biceps more
- Starting position: Arms fully extended (but not locked out)
- Pulling up: Depress your shoulder blades first, then use back strength to pull yourself up
- Top position: Chin clears the bar; do not overextend your neck
- Lowering: Control the speed; do not drop
Sample Training Plan
Beginner (0 reps):
- Daily: 3 sets of 5 eccentric pull-ups (5-second slow descent)
- Or daily: 3 sets of 8–10 assisted pull-ups with a resistance band
Intermediate (3–5 reps):
- 3 times per week: 3–4 sets to failure
- On rest days: accessory exercises (rows, lat pulldowns)
Advanced (10+ reps):
- Add weight (dumbbell or sandbag on a belt)
- Vary grip width (wide, narrow)
- Use asymmetrical hand spacing
4. Safety Precautions
Usage Safety
Warm-Up:
- Thoroughly warm up your shoulders and wrists before pull-ups
- Recommended: 10 shoulder circles, 10 internal rotations with a band, 30-second wrist support hold
When Not in Use:
- Ensure the bar is stored out of children's reach
- Children may climb on it; door frame clamp-on bars in homes with kids require additional securing
Post-Use Inspection:
- Quickly check clamp tightness before each use
- For door frame clamp-on bars: Inspect rubber contact points monthly; replace if worn
5. Accessory Training Equipment
Wrist Straps / Grip Aids
- Provide wrist support, reducing pressure on the joint
- Prevent blisters during high-rep training
- Not recommended for every session: Over-reliance can reduce hand strength development
Weight Belt
- Use with a chain or dumbbell for added weight
- For advanced trainees
- Choose a wide belt (distributes load over a larger area)
Buying Recommendation Summary: Door frame clamp-on bars are the most affordable and convenient, but you must confirm the door frame is solid wood. For long-term use or unsuitable door frames, choose a wall-mounted bar. If you have the budget and space, a free-standing station is the safest and most stable option.
Related Guides
Summer Cooling Clothing: Which Fabrics Actually Keep You Cool?
Compare merino wool, linen, and other breathable fabrics to choose the best summer clothing for comfort, sweat management, and odor control.
The Ultimate Guide to Tent Wind and Rain Performance: Structural Mechanics & Fabric Technology
What does a tent's 3000mm water column rating mean? What wind force can it withstand? Why is a double-wall tent better than a single-wall? Which lasts longer for waterproofing: silicone or PU coating? This guide breaks d
When hiking for the first time, you need to buy all the equipment to be safe.
Many people wear sneakers and carry ordinary backpacks for the first time, and walking for three or four kilometers is no problem. However, once they encounter mountain roads of more than 5 kilometers and terrains with an altitude of more than 1,500 meters, incorrect equipment will bring real risks - ankle sprains, hypothermia, and lack of basic supplies after getting lost... This article sorts out the logic of choosing hiking equipment.